I’ve moved the link for the MSU Horticulture Garden News from MCMGA links into Garden Resources you will find it there. I’ve also add two added resource links in the Gardening Resources. These were provided by Frank and Jennie. The first is The Oakland Gardener Newsletter. This newsletter gives us incite and ideas of other projects going on. The second is Agricultural Research Services. Jennie commented “this site offers research reports as well as a section for kids with ideas for ag-related science fair projects, and simpler descriptions of some of the interesting research like feeding citrus peels to cattle so that the natural antibiotics can regulate harmful bacteria in their guts. And there is the 2012 hardiness zone map. Looking at the Michigan section, I see the Milan and Dundee folks are still 5b, while you LaSalle and Luna Pier gardeners can try “southern” 6b plants!” I’m sure you will find both of these sites great reading resources.
Archive for January, 2013
New Links Added
Posted in Favorite Gardening Websites on January 31, 2013| 1 Comment »
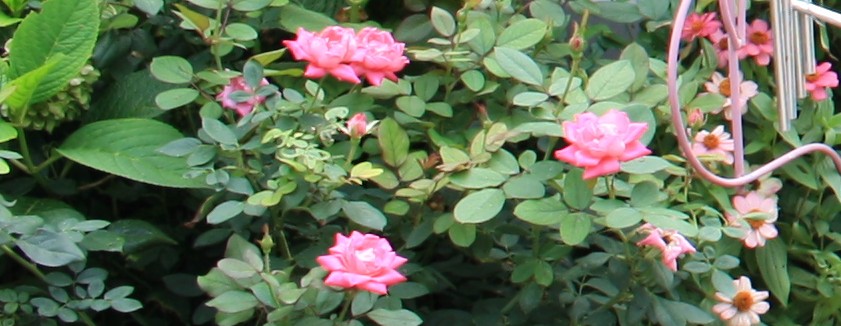
Feature Flower – The Rose
Posted in Gardening on January 31, 2013| 2 Comments »
Who can think of the month of February without thinking of a Rose? The rose is of the genus Rosa and is a woody perennial. It belongs to the family Rosaceae. Although we associate getting roses from our loved one with the hybrid tea rose, my favorite to grow is a “true knockout”. The Knock Out® Rose is the most carefree rose you can grow. It’s winter hardy as well as heat tolerant. It’s even self-cleaning, although you may want to deadhead it after bloom to encourage additions flowers. This rose is also the most disease resistant making it a great choice for the garden. You can find it blooming every 5-6 weeks until there is a hard frost. Knock Out® roses come available in a variety of colors with single or double blooms. To top all of these positive growth habits, you also find them available fragrant. To add one more benefit of this plant; its foliage is a health lush green that looks good even when the plant is not producing blooms. What more could a gardener ask for in a rose? Just sit back and enjoy it’s beauty. Plant it for a shrub border, a hedge or for a foundation planting. I’ve even added them into containers. It’s a great stand alone rose, but accents other plants perfectly. We are all aware of how much we have to maintain the typical hybrid tea by pruning, making sure it doesn’t have black spot or even downy mildew and getting that one or two few blooming times a season. This rose gives us beauty throughout the season. Plant one this spring, if you haven’t already and enjoy. Send me your photos for Foto Friday of your favorite rose.
Calendar
Posted in Events, Uncategorized on January 26, 2013| 8 Comments »
You should now be able to view events on our Calendar Page. If you have an event you would like to have posted on the calendar, please send it to me by e-mail.
New Link: MSU Horticulture Garden News
Posted in Favorite Gardening Websites on January 26, 2013| 3 Comments »
You will see a new link added to our MCMGA links found along the right side of the Blog called MSU Horticulture Garden News. It is toward the bottom so scroll down to find our MCMGA link area and click on MSU Horticulture Garden News. The link will then load to that page. This is a great informational link with many articles for us to dig into during these winter months.
Credit for giving us this source goes to Georgeann who sent it to Frank. I think you all will enjoy it.
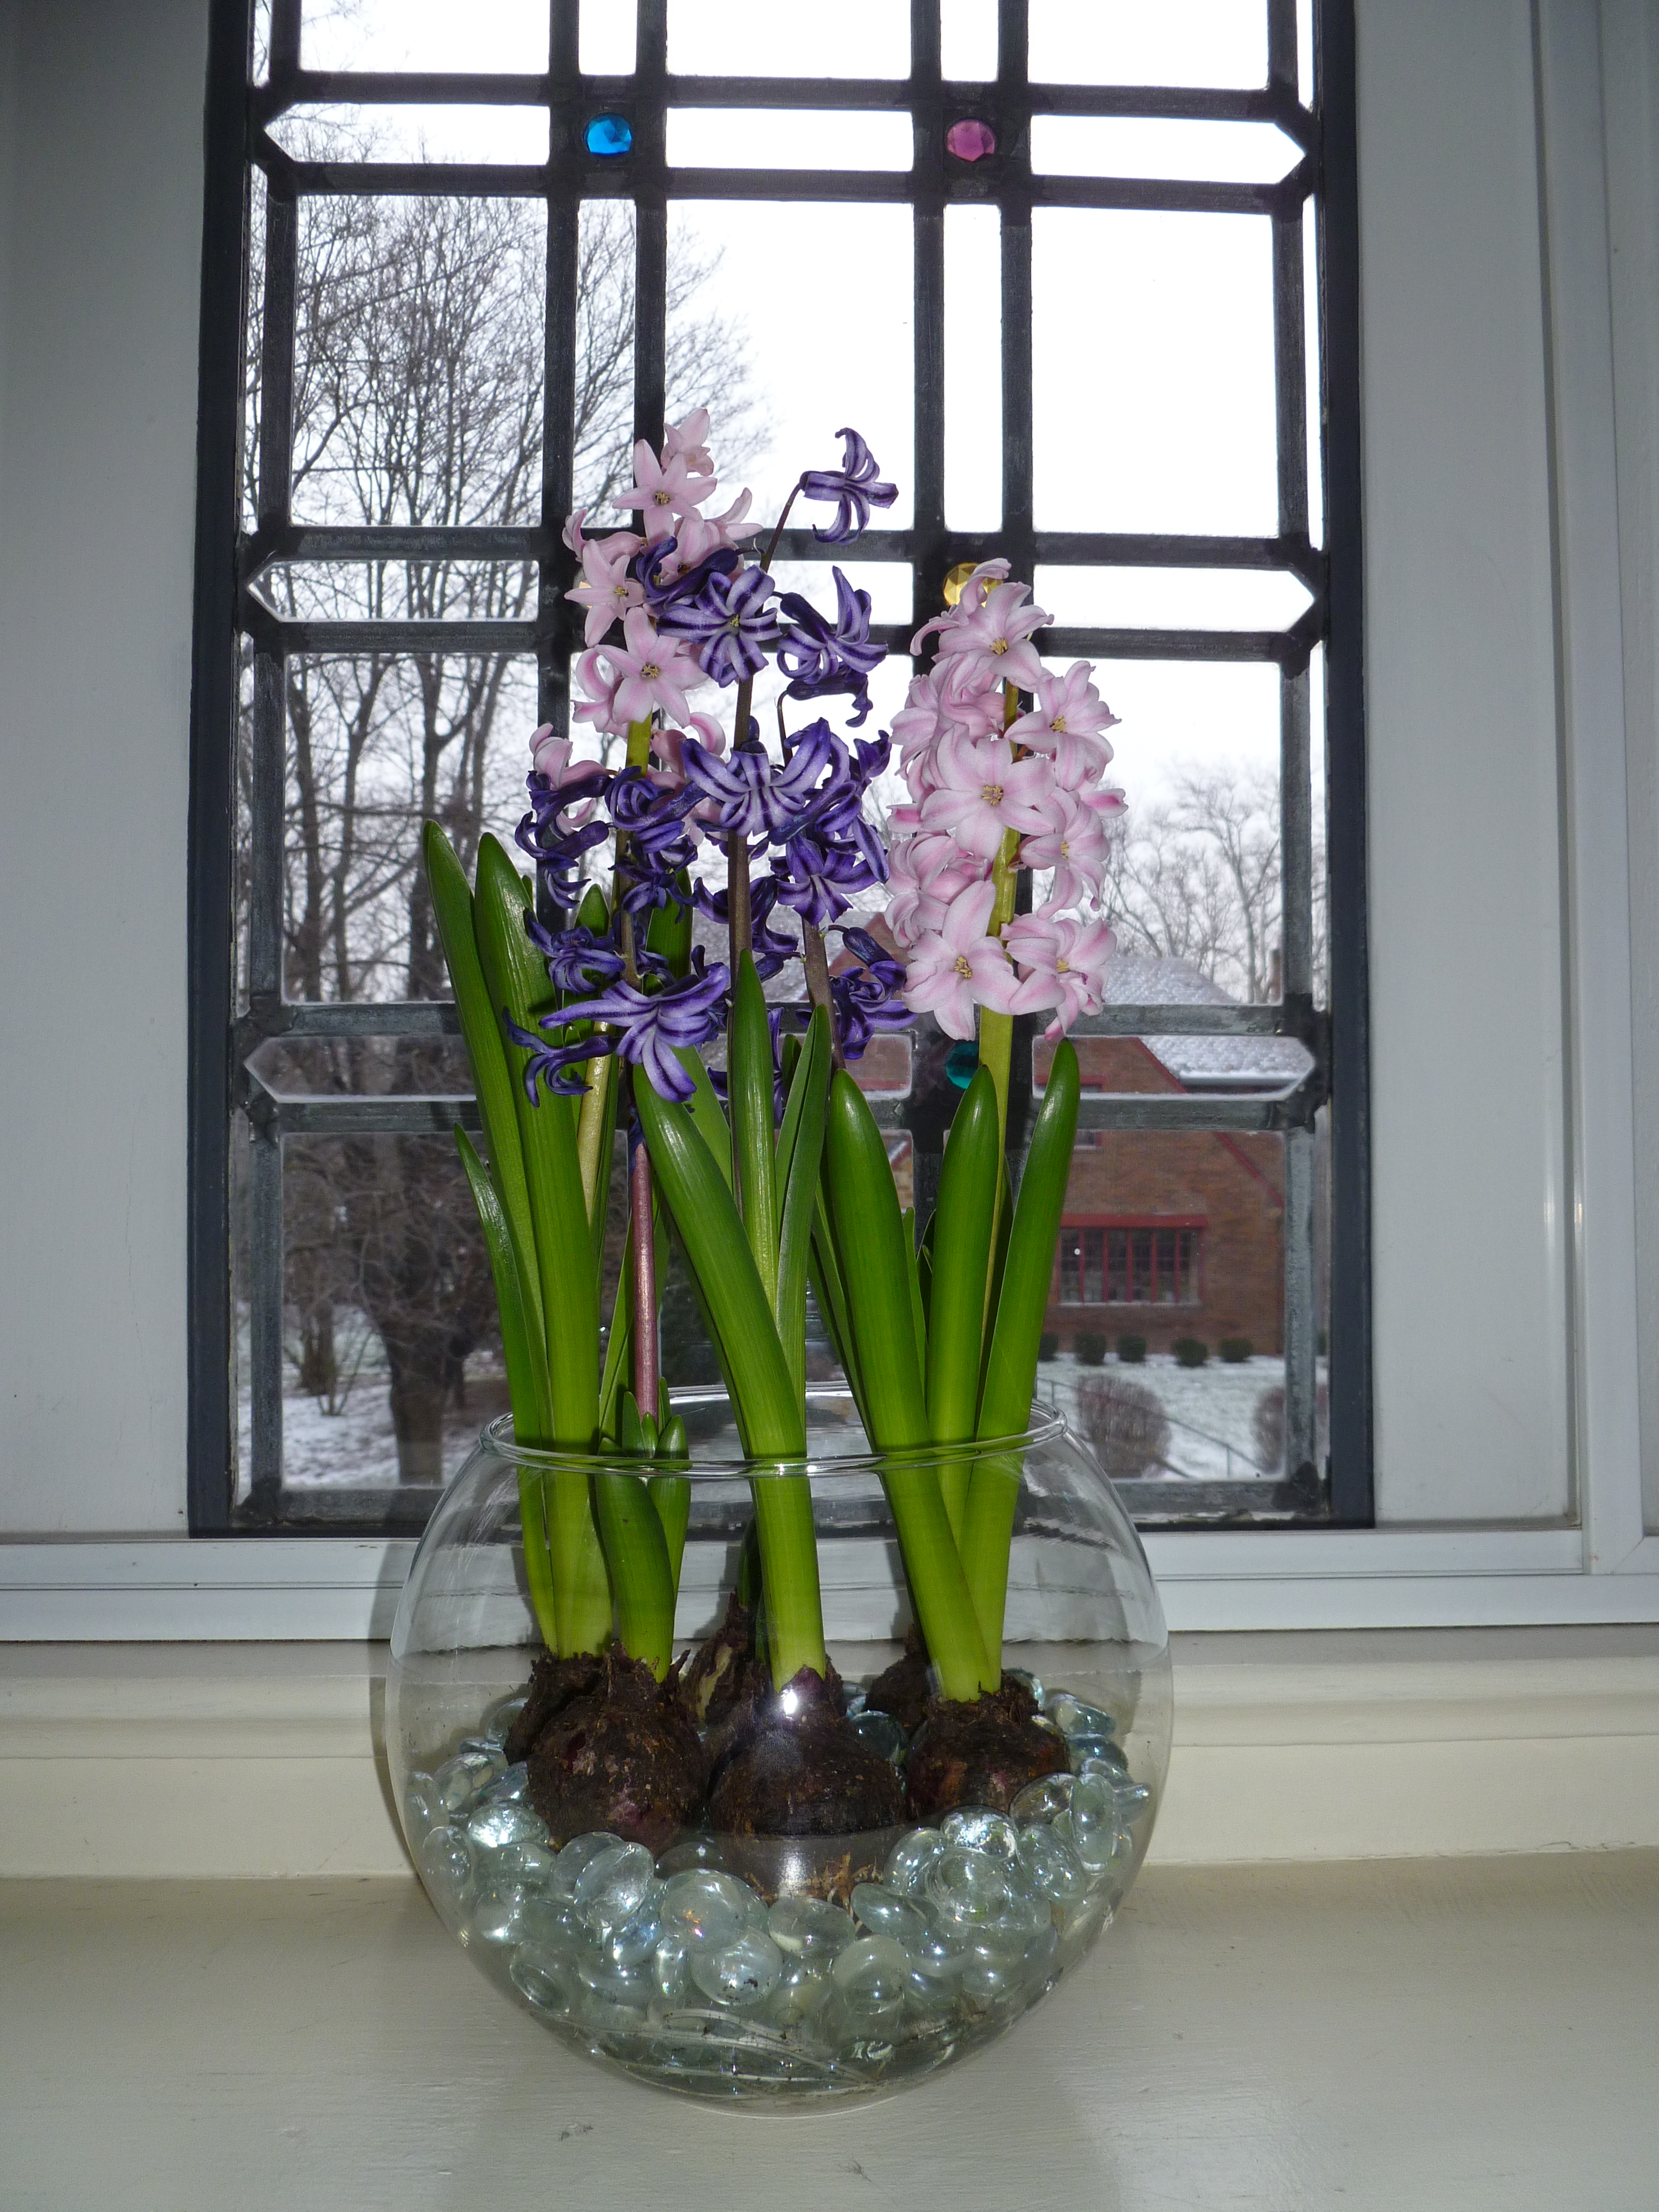
Hyacinth Bulbs have Bloomed by Mary Ellen Babich
Posted in Uncategorized on January 23, 2013| Leave a Comment »
- Do the same: use clear glass containers and clear glass beads so water levels and root growth can be observed; after removing from cooling area, place on unheated window sill out of direct sunlight so plants emerge slowly
- Do differently: use first year bulbs; keep in cooling area longer than 7 weeks to ensure bigger blooms
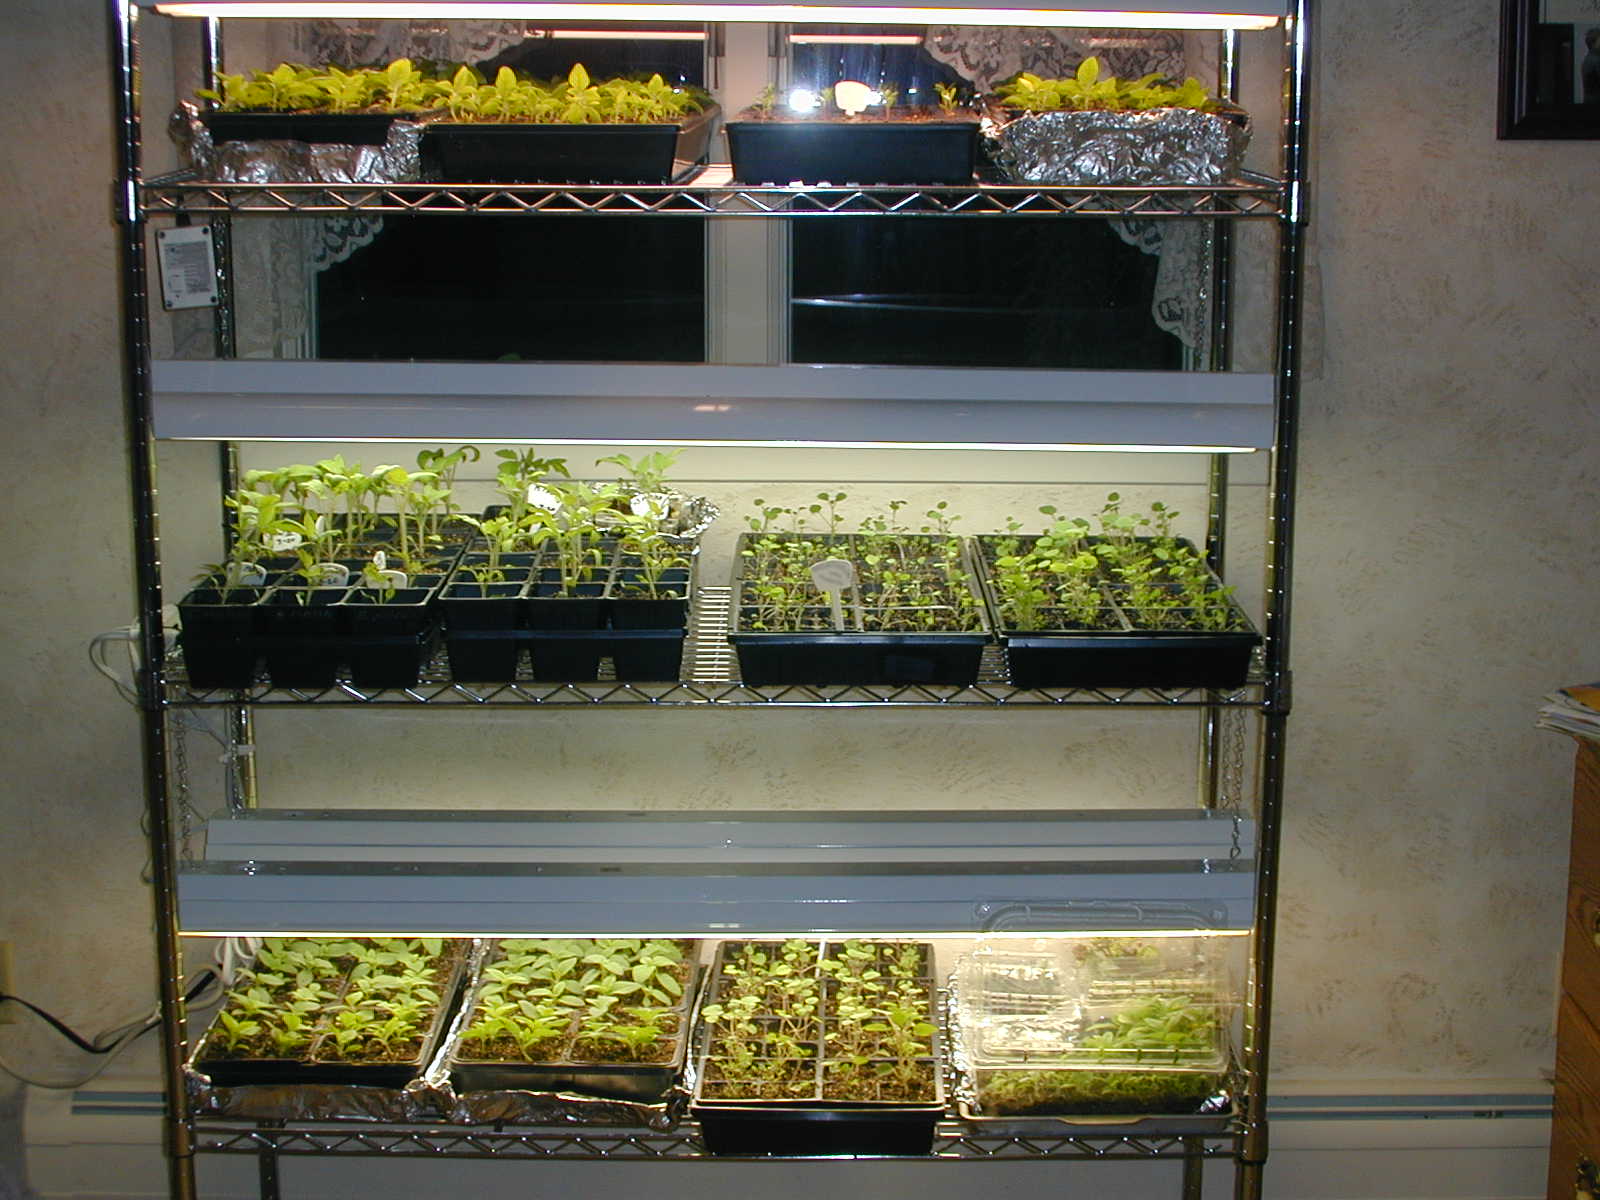
Seed Starting Plant Stand by Naida Albin
Posted in Educational on January 22, 2013| 4 Comments »
Photos taken April of 2007 when I purchased a 4 shelf, chrome stand and 3 2-lite shop lamps – with chains for hanging -from Lowes. The stands are sold unassembled and they are offered with either 3 or 4 adjustable shelves (but everything has to be removed from the stand to adjust the shelf height). I found it much easier to evenly space the 4 shelves from top to bottom, hang the 3 shop lights and then stack books and/or boxes under the seedling trays so the plants are always very close to the lights but not in direct contact. Once the plant trays are in place it is too difficult to get to the chains to raise and lower the lights – much easier to raise and lower the seedling trays! As much as possible keep plants similar in height together. Google “growing plants under fluorescent lights” and you will find all the information you will need to be successful.
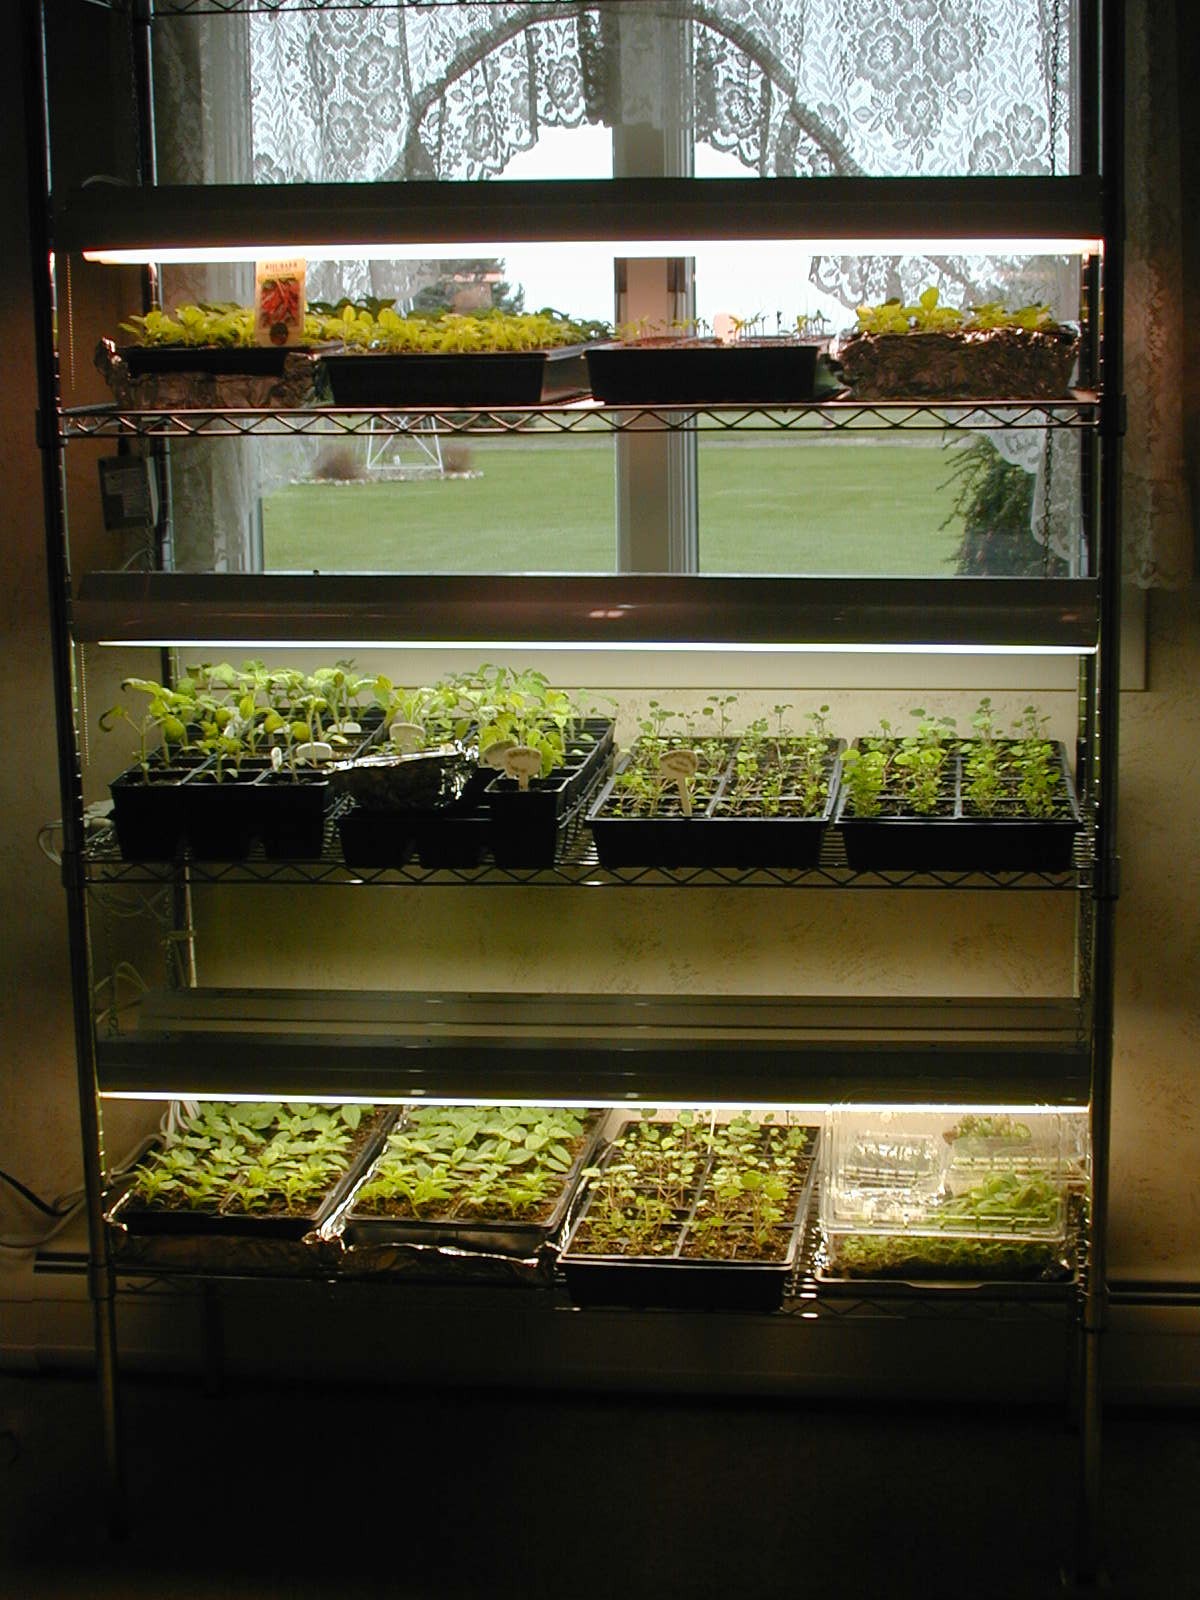
If you have a south facing window that also works quite well. I have put seedling trays on TV trays in front of the window but they will grow toward the light and have to be turned several times each day. If the sun doesn’t shine for several days you will quickly end up with very weak, leggy plants.
STARTING SEEDS BY KAREN HEHL
Posted in Educational on January 21, 2013| 4 Comments »
I took these pictures last spring when I was starting my pepper seeds. Today the snow is blowing outside and the new seed catalogs have been coming in the mail. It is time to start thinking about what seeds we want to order this year. I like to use the Jiffy peat pellets for starting pepper seeds. I grow many different varieties that I don’t want to mix up and I only want a few plants of each variety.

Pellets in Container
Here are the peat pellets in containers. The ones in the back two black trays have had warm water poured in them and are beginning to swell up. The white pieces of plastic are going to be dividers to separate varieties. I don’t know if you can see it on here or not, but the black trays are labeled “A” “B” “C” “D” and I keep notes of what is planted in each tray. The clear ones on the left are just deli containers. They do need to have lids to keep the growing medium moist until the plants come up.

The pellets are now fully swelled up and ready to plant.
Pull the netting back some with a toothpick.

Open a small hole in the peat with the toothpick
Open a small hole in the peat with the toothpick. Planting depth about three times the size of the seed. Drop a seed in the hole and use the toothpick to cover the seed, pressing lightly for good seed to soil contact.

Warm location
Trays in a warm spot to germinate. (My kitchen floor next to the radiator) This was March 12. On March 18, the first of the seeds were up.

Temporary Greenhouse
March 18, putting up our temporary greenhouse on the door opening of my husbands heated barn. Starting March 22, the peppers spend days in the greenhouse in the sun and nights in on the barn floor with the door closed.

Pepper Plants
April 4, here the peppers are on the heated floor of the barn, with the door open from the barn to the greenhouse. The largest ones have a second set of leaves and are ready to be transplanted into single squares. Although technically you can leave the netting around the pellet when you plant it in a larger container, I gently pull it off, so you want to do this before too many little roots have grown through it.

Pepper Plants April 30
Pepper plants on April 30th. Some have been in their single squares for over 3 weeks now. They are gradually getting used to outdoor conditions, either with the greenhouse doors open, or as here spending some time outside on the cart in direct sun. This year, they were planted in the garden the first week of May.
Forcing Hyacinth Bulbs by Mary Ellen Babich
Posted in Educational on January 14, 2013| 2 Comments »
Hyacinth
Hyacinthus is a small genus of bulbous flowering plants in the family Asparagaceae, subfamily Scilloideae. Plants are commonly called hyacinths. Wikipedia
| Scientific name: HyacinthusRank: GenusHigher classification: LiliaceaeLower classifications: Hyacinthus orientalis |
Forcing Hyacinth Bulbs
by Mary Ellen Babich
What can you do with several dozen hyacinth bulbs that are still sitting in a bucket in your unheated garage in late November? That was my question last November.
Way back in October of 2011, I planted 5 dozen premium pink and purple hyacinth bulbs in soil in 4 large containers, watered them thoroughly, stored them (covered loosely with burlap) in my unheated garage until growth of about 3-4 inches appeared in early spring, then set them out in a shaded area on my patio to watch the pink and purple display and enjoy the heady fragrance. I was thrilled with the results, so I decided to try to save the bulbs. After the blooms faded, I placed the containers in a holding area, removed the spent flowers, kept the containers watered, and waited for the foliage to die back naturally. In late summer I lifted the bulbs from the containers, gently removed the dead foliage and the soil clinging to the bulbs, and put them all in a large bucket in my garage to dry. The plan was to plant the bulbs directly into my gardens in the fall of 2012. That didn’t happen.
Switch to Plan B: force the bulbs to bloom indoors. Thanksgiving weekend I saw that the bulbs were still firm and surprisingly all had about an inch of very green growth at the tip. The first weekend in December I placed the bulbs in clear glass containers on top of glass beads and slowly added water. Single bulbs were put in stem-less wineglasses and groupings were put in large bubble bowls, placing the bulbs so they would not touch the sides of the container or each other. To be sure they didn’t rot, I kept the water level was just below the base of each bulb. Then the containers went back into the unheated garage in large cardboard boxes. After 3 weeks, when the bulbs pushed out more green foliage about 2 inches tall and sent tiny white roots into the water below, I moved the containers inside to a cool window sill out of direct sunlight to monitor water levels and growth. A week later, I had a dozen Christmas gifts ready to deliver to family and friends, and two large containers for myself.

Overhead View

Roots

Side View
My containers will remain on a cool window sill out of direct sunlight until they are ready to bloom in few weeks. I won’t know if the conditions have been optimum for producing full or stunted blooms yet, so I’ll send another photo when/if they do bloom.
The process of forcing bulbs in water is fun and very educational. I felt like an inquisitive science student in grade school again, hoping I could induce a plant to grow ahead of its normal growing cycle. I’ll be trying this great project with my grandchildren next fall so they can observe the entire growth cycle of a bulb and enjoy the beauty and fragrance of a hyacinth bloom indoors in their homes in late winter.
Follow the link below to Old House Gardens, an Ann Arbor based company that specializes in heirloom bulbs, for a discussion of the history of bulb forcing and step-by-step instructions.
DIVIDING DAYLILLIES BY KAREN HEHL
Posted in Educational on January 11, 2013| 2 Comments »
I had to move some perennials out of our north garden this past spring. We had to put in a new seepage bed, so I lost the east half of the north garden. As long as I had to move them I decided I might as well divide them at the same time. Here are some pictures I took of dividing the day lilies.

Some of the day lilies in their original spot, before starting.

Digging around a plant with the shovel. Cut all the way
around the plant and underneath as deep as you can get.

With the lily lifted out. Slicing the lily in half with the sod lifter

With the half clump flat side down, dividing again

Putting a division into a pot.

Potted lilies waiting for a drink.

Lilies with the tools used.
Lilies with the tools used. Some of my favorites, the wheelbarrow, sod lifter and watering can. Also some pots I got from a neighbor which I have used many times for transplanting and for covering small plants when there is a danger of frost.
The lilies were dug up and divided on March 25th. Some were divided in half, some into quarters. These were plants from some of our master gardener plant exchanges and some I moved from my Mom’s garden. several years ago. They spent a little over two weeks in the pots, sitting on carts.

April 10th. The lilies re-planted in their new row

Notice the 100ft measuring tape. They are planted 2 foot on center.
The lilies did not bloom much this summer, which I am blaming on the stress of moving and a very dry summer. I am looking forward to them having a more colorful year.
Karen Hehl
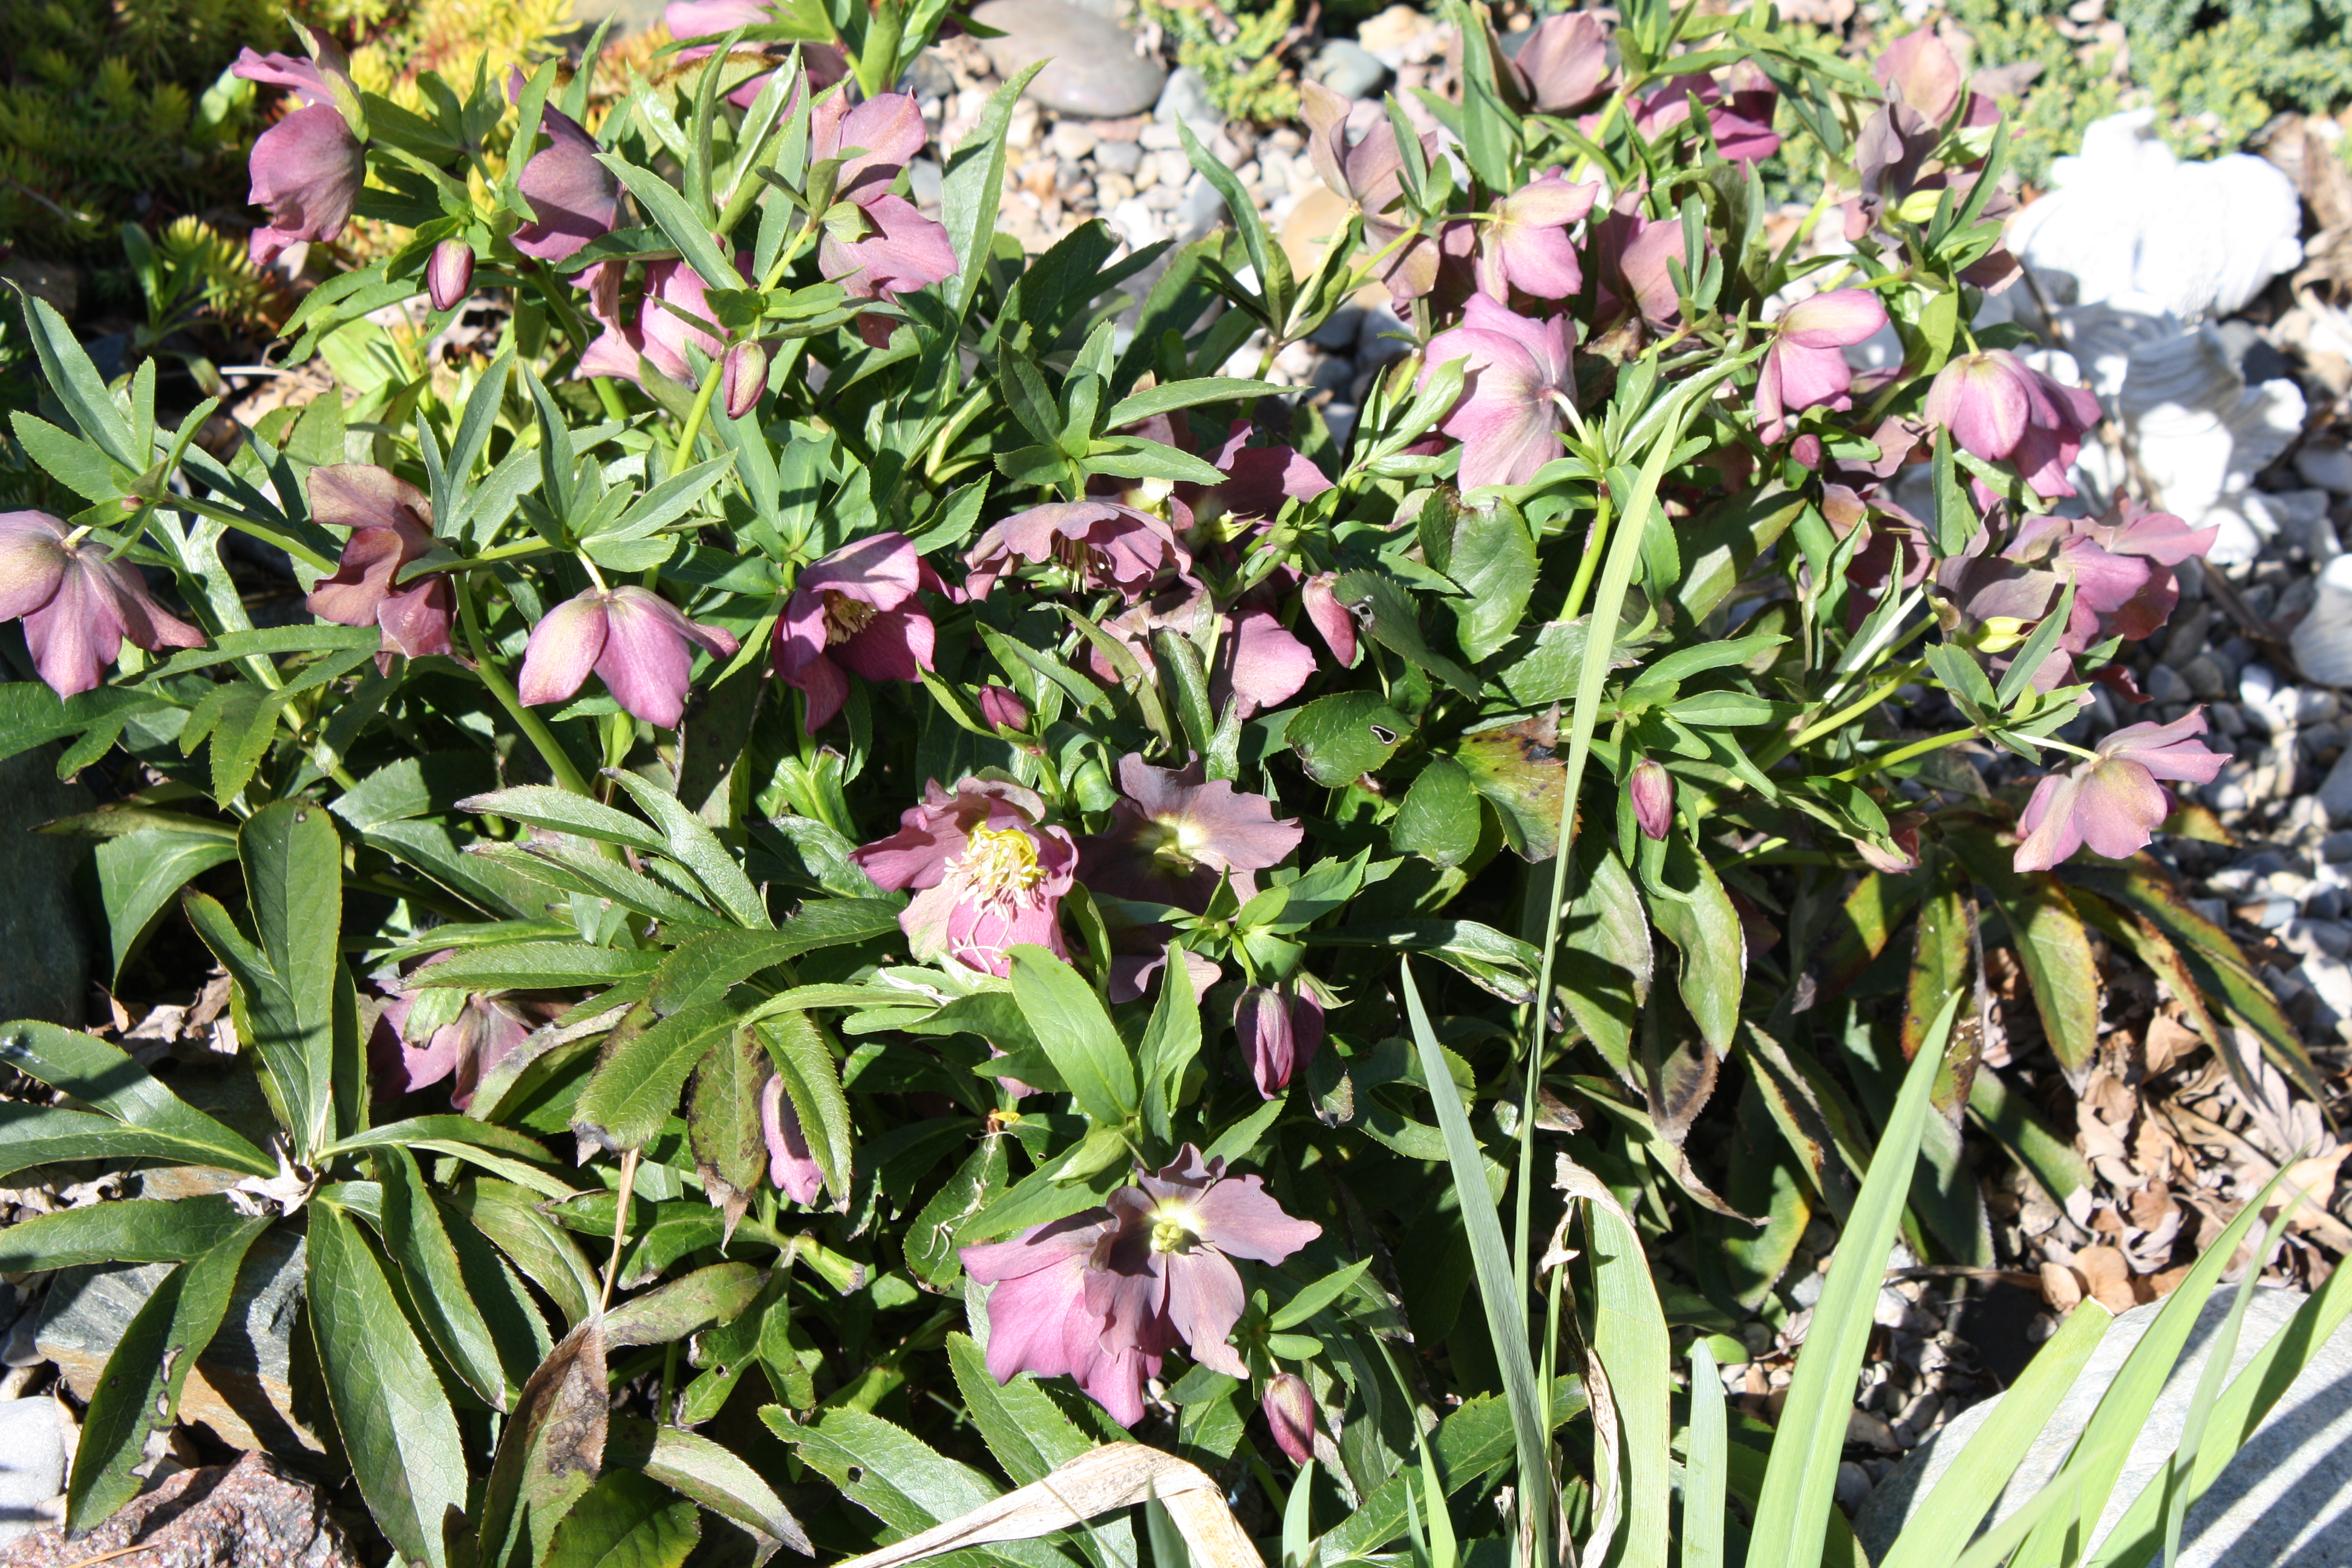
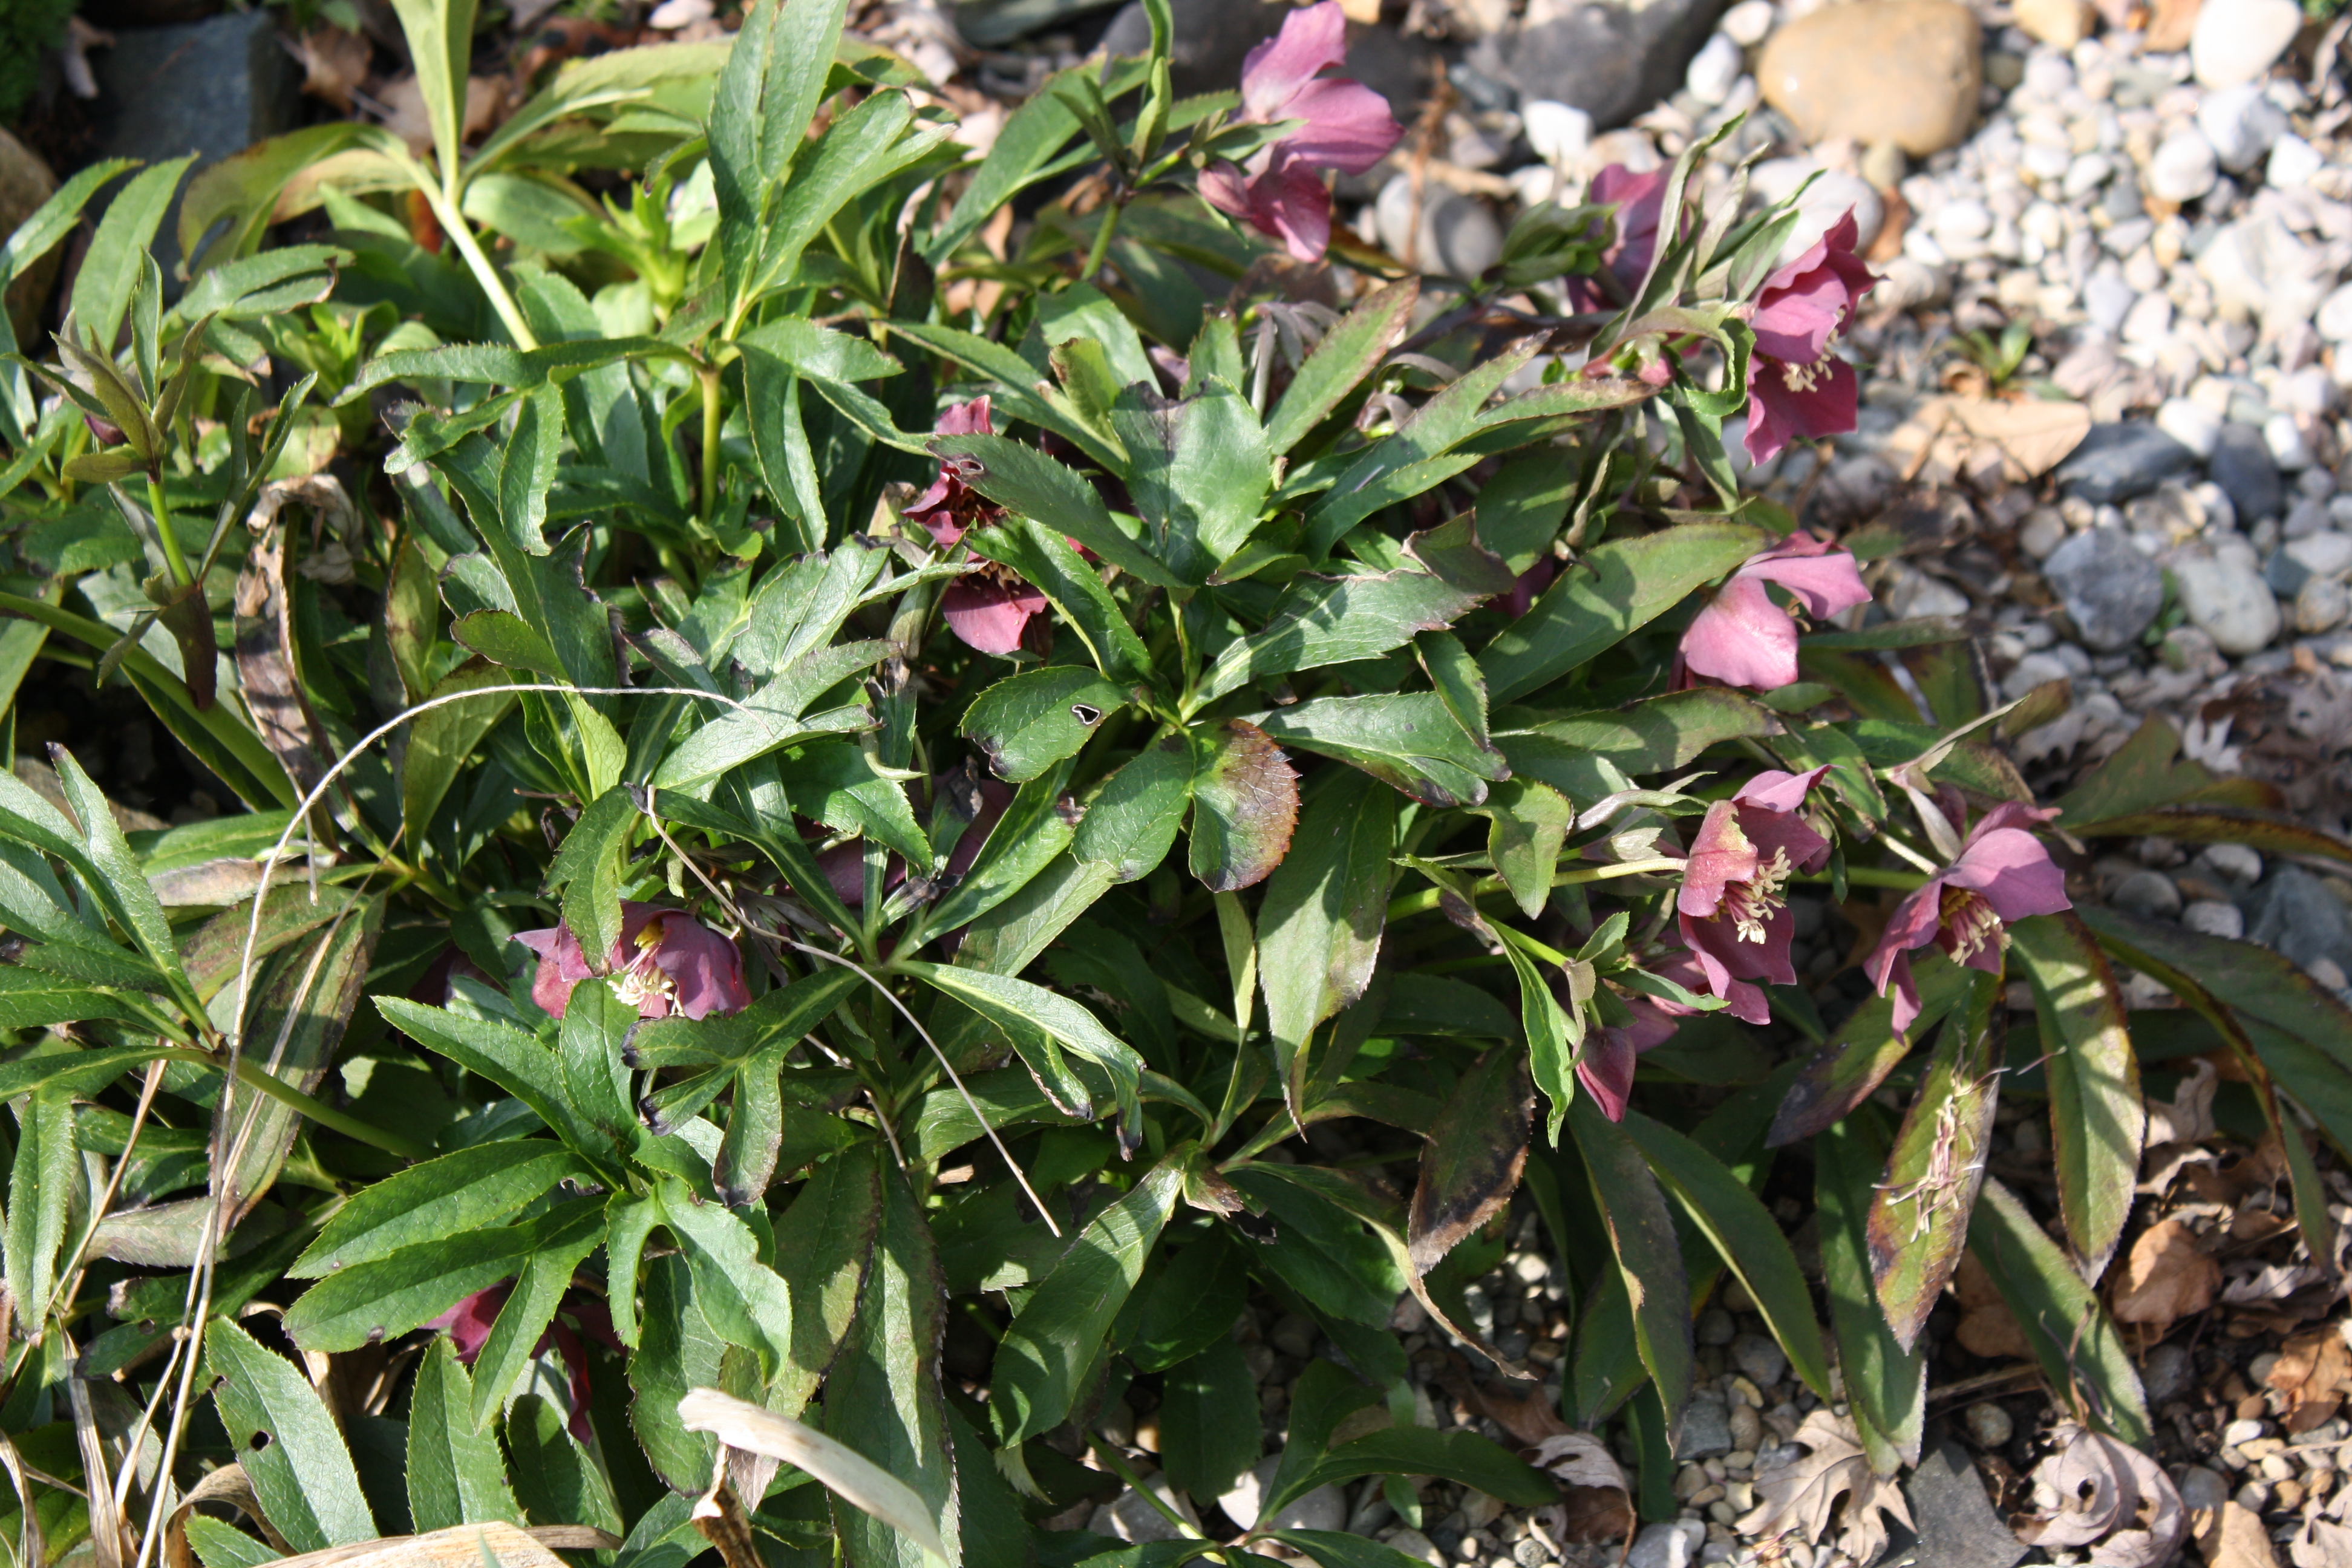
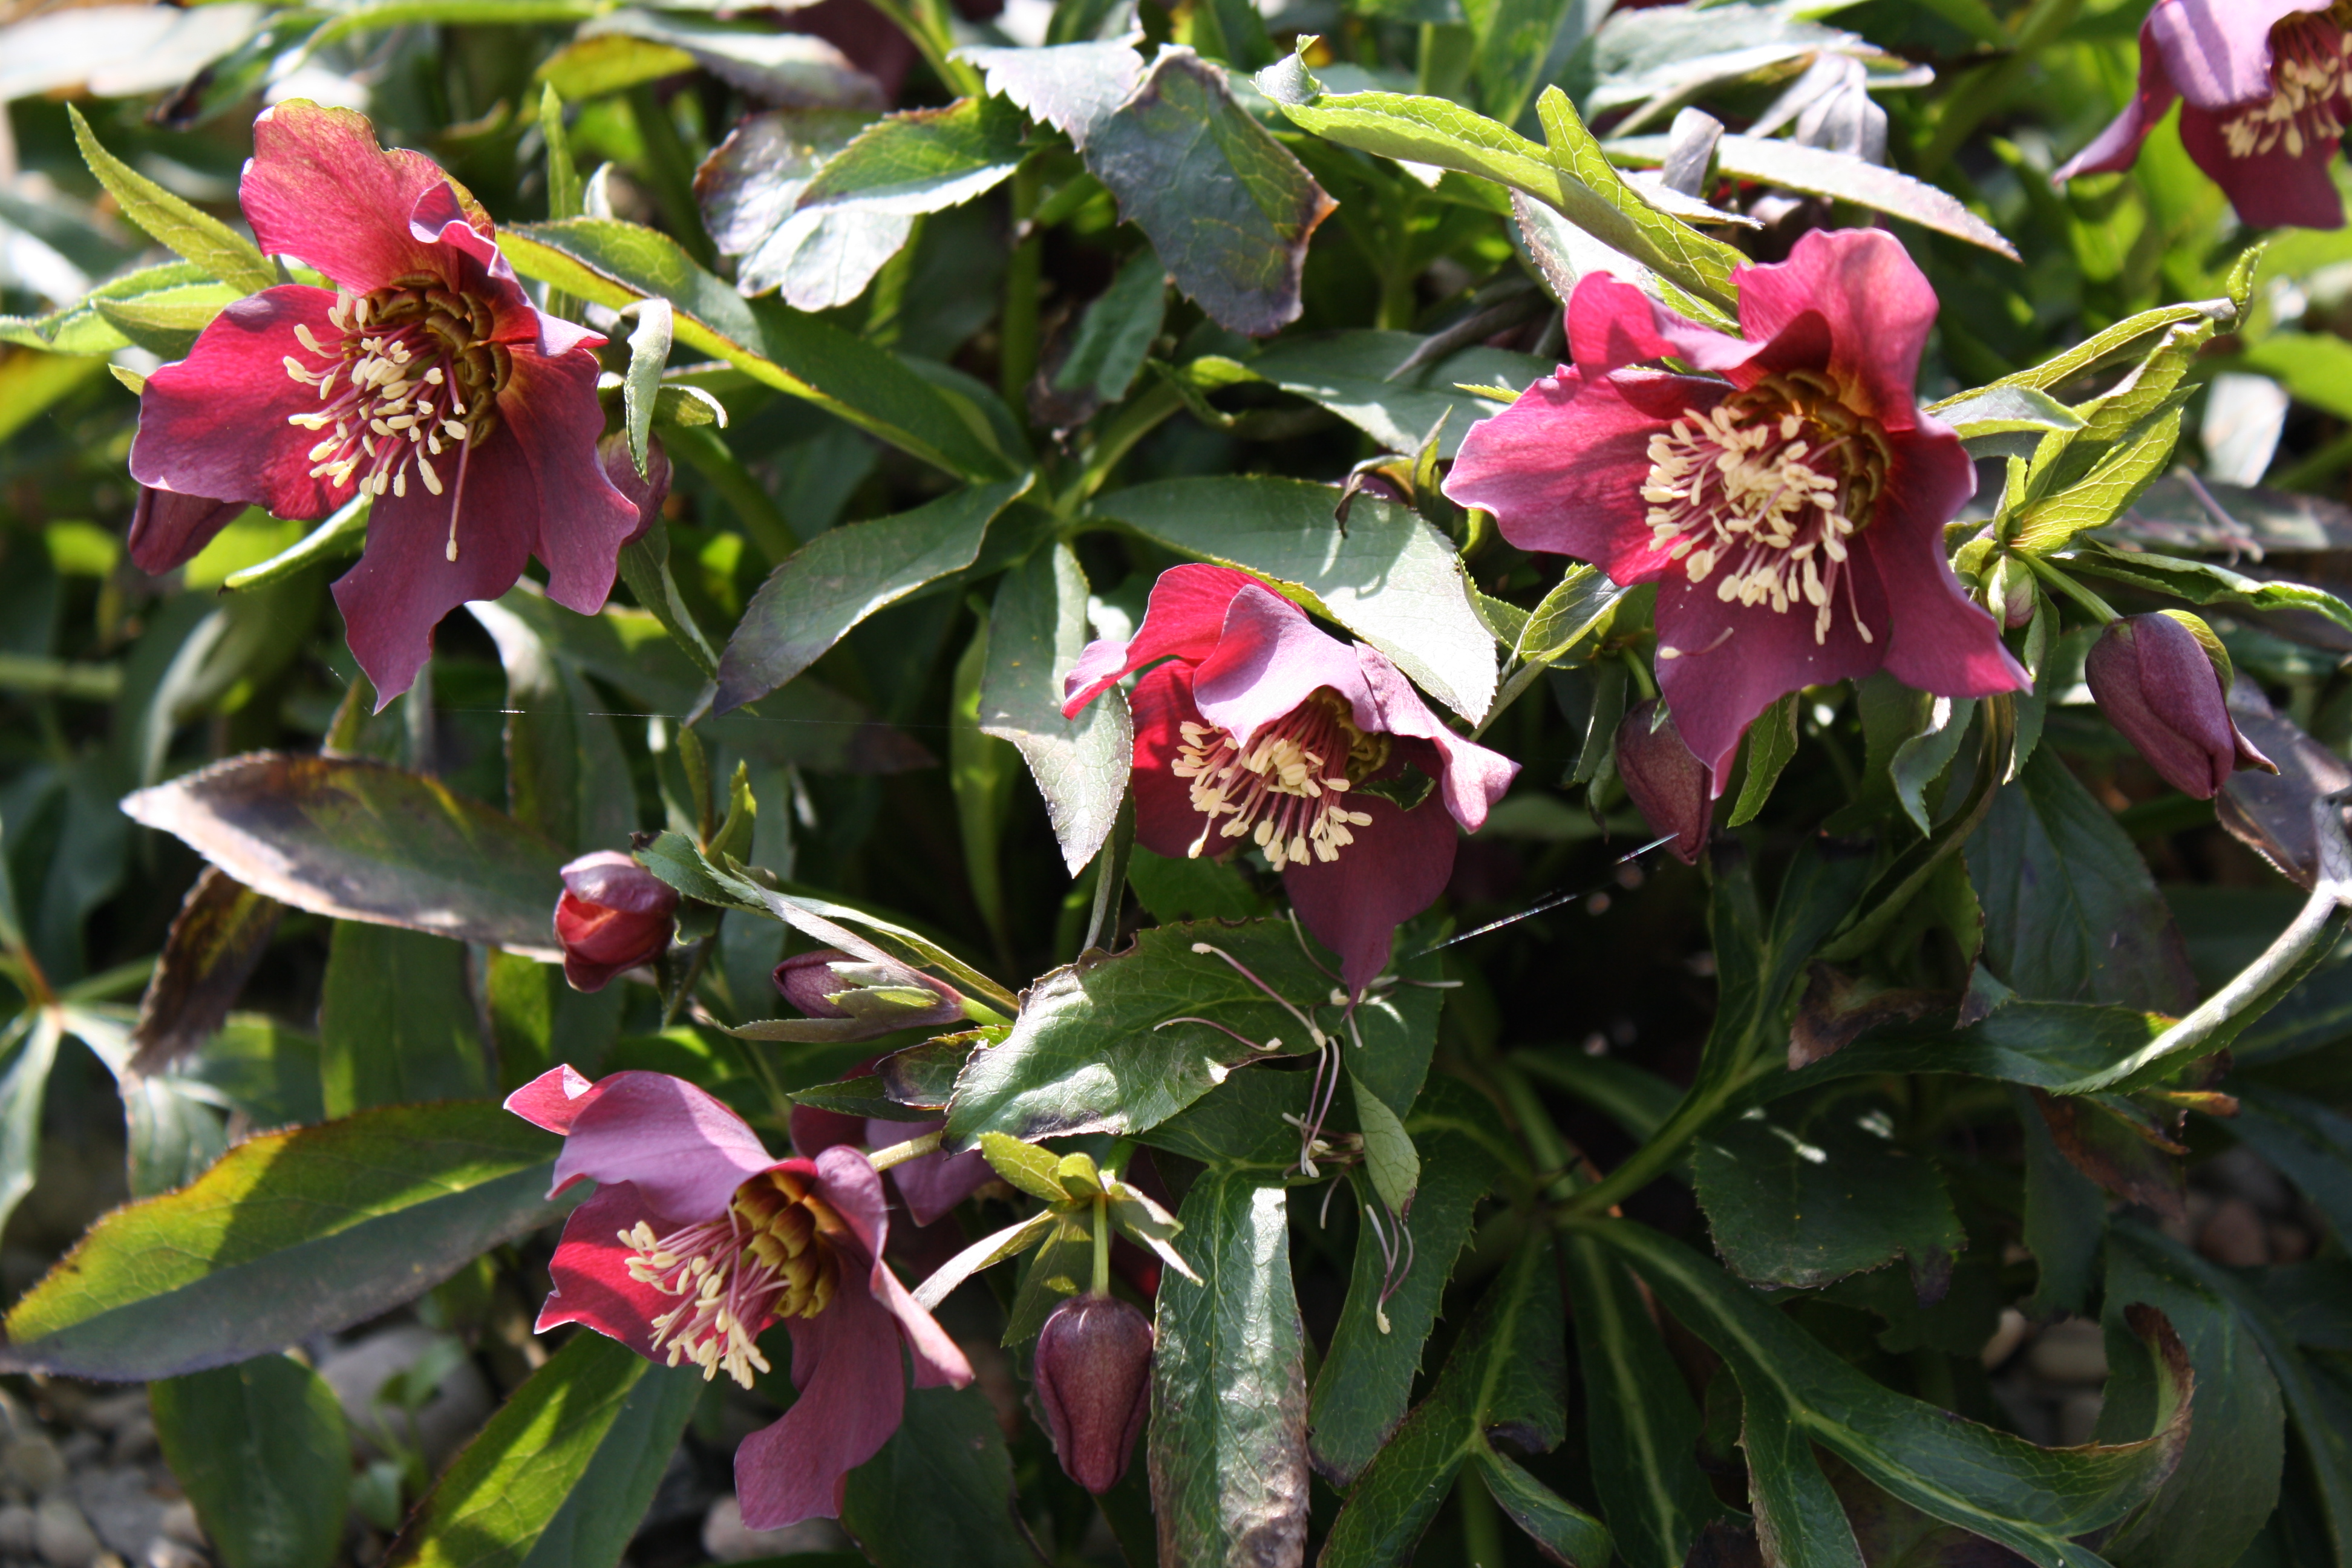
Feature Flower – Hellebores
Posted in Uncategorized on January 1, 2013| Leave a Comment »
Our feature flower for January 2013 is Hellebores (the Genus Helleborus). This plant is sometimes referred to as “Christmas Rose” or “Lenten Rose” since they begin to show blooms in late winter and early spring. Their blooming season is generally between December and March and often continues through April and May. Its large leaves may stay green thru the winter and add some interest to the garden. I understand that there are both evergreen and herbaceous varieties. The feature photo is from my backyard. This particular Hellebore is a single black variety. Sorry I don’t have the name since I usually purchase at the end of the season to be a bit more frugal. Name tags aren’t always on the plants. However, in spring you will find them available in a variety of colors both single and double blooms. It has been my experience that some tender loving care and frequent watering is best until they become established. Once established they are quite drought tolerant. They are often sold in the nurseries as a shade plant but do very well in light sun or dappled sun. This plant was put into the soil two years ago. It produced a few the first year, however this past year there were dozens of blooms on it. It was planted near my pond that gets at least six hours of early sun. Possibly the mild winter helped as well. Propagation may be done by seed; but that may take up to several months for the seedling to appear. It also does not guarantee that your seedling will be similar to the parent plant. It’s easier to propagate through a cutting or division. However you obtain them, you will find Hellebores to be a great addition to your garden.